UPDATE: 8/11/2015
I've updated this post to include a new file 'map.js' which contains an independent Map class. Instructions on using it are included below.
I've updated this post to include a new file 'map.js' which contains an independent Map class. Instructions on using it are included below.
UPDATE: 5/18/2015
Click here to play a live demo. Granted, it's not very exciting, but it proves the concept
Click here to play a live demo. Granted, it's not very exciting, but it proves the concept
Not too long ago I decided that I wanted to learn how to program in JavaScript. And so, of course, I set about to program a game (I've always believed that one of the easiest, and most entertaining ways to teach yourself a new language is by programming a few simple games). I chose Phaser as my framework, and went to work.
One of the things that I wanted in my little game was a randomly generated environment, however, I couldn't seem to find any good tutorials on how to accomplish this. So I had to expand a bit, and figure some things out on my own...
One of the things that I wanted in my little game was a randomly generated environment, however, I couldn't seem to find any good tutorials on how to accomplish this. So I had to expand a bit, and figure some things out on my own...
Introduction
The following tutorial helps you build a room-and-halls type randomly generated map (though, I'm sure that with a little tinkering you could make it into caves and tunnels, or whatever else your little heart desires). The concept, and many of my functions and classes in this tutorial are very heavily based on the LibTCOD For Python Tutorial, Part 3 found here. Really, the credit for this should go there. I just ported the idea to JavaScript/Phaser.
In order to follow this tutorial, you will need to know a little bit about Phaser, and should have, at minimum, completed the tutorial that is provided here.
Basic Premise
The basic idea here is that we use tiles to create the map. Some tiles are floor tiles, which the player can move over, and others are wall tiles, which the player cannot move over. To allow for better complexity in the map, the wall tiles are 16x16 pixels, and the floor tiles are 32x32 pixels. For the sake of the map, we treat this arrangement like a grid, although the player is not restricted to grid-like movements.
At the very beginning of rendering, we will cover the map in wall tiles. We then carve out rooms and tunnels as floor tiles. That process is as follows:
1. Given certain parameters we create the first room, and we place the player at the center of it
2. Following the same parameters we make the second room
3. We then create two tunnels, a horizontal one, and a vertical one.
4. These tunnels will have their starting and ending coordinates determined by the position of the rooms they are connecting.
5. The tunnels intersect, creating a single tunnel with a 90 degree bend in it (assuming that the position of the rooms requires such a bend.
6. A third room is created
7. Another horizontal and vertical tunnel pair are created to connect the third room to the second room.
8 The process continues until their maximum number of rooms has been reached.
I do allow for rooms to overlap. I did this because, in my opinion, it gives the map more 'texture' and makes it more interesting.
Getting Started: Essential Variables and Creating the Player
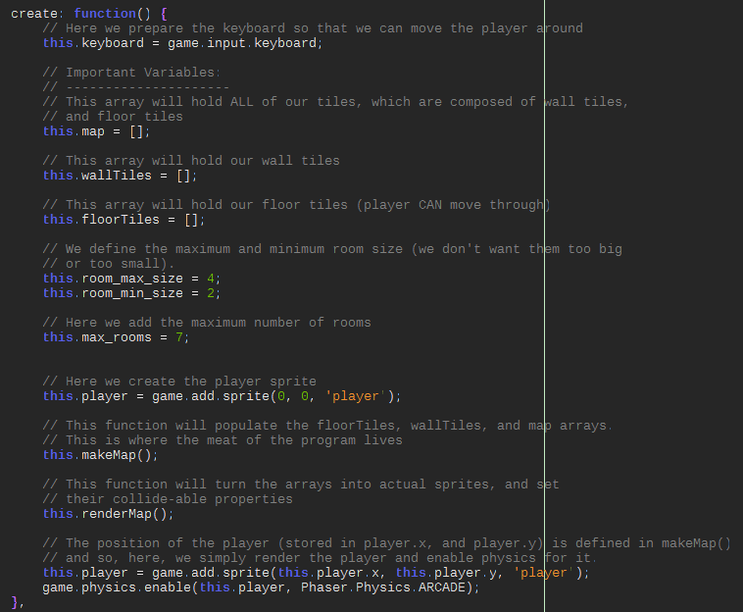
The first thing we're going to do is create our variables that will define the map, the wall tiles, the floor tiles, the room size, and the maximum number of rooms. For the room size, and maximum number, feel free (after the tutorial) to play around with the numbers and see how it effects the map's rendering. I picked values here that I thought made for the most balanced map.
For reference, my game world has a height of 640 pixels, and a width of 480. Notice that those are both evenly divisible by 32. As long as we are working with 32x32 tiles, this is a good idea.
Also I'm loading images called 'Floor', 'Wall', and 'Player' (you can tell I'm very creative). Also, don't be freaked out that you can't copy/paste the code. At the bottom of this post, I'm providing play.js which has all of the code in it, along with many of the comments and explainations.
The following code goes into your 'create' function (a standard Phaser function):
Creating the getRandom Function
I needed an easy way to get random numbers from a range, and so I create the following function:
I needed an easy way to get random numbers from a range, and so I create the following function:

Creating the Tile and Room Classes
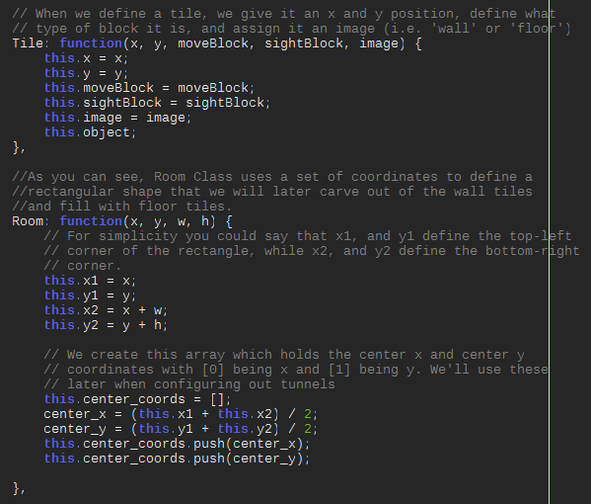
As you may know, classes are defined in JavaScript as functions. This class is used to define a single tile on the game screen. Now, you'll notice I've included "moveBlock", and "sightBlock" attributes. This is a hold-over from the LibTCOD tutorial, but I haven't fleshed it out yet. I'm keeping it in, as is, because it doesn't hurt the code any, and might give you some ideas for expanding on my idea:
As you may know, classes are defined in JavaScript as functions. This class is used to define a single tile on the game screen. Now, you'll notice I've included "moveBlock", and "sightBlock" attributes. This is a hold-over from the LibTCOD tutorial, but I haven't fleshed it out yet. I'm keeping it in, as is, because it doesn't hurt the code any, and might give you some ideas for expanding on my idea:
The createRoom function
This function fills the coordinate areas (defined in the Room class) with floor tiles, and then pushes it to the map array that we defined in the create function.
This function can be a little difficult to understand for people unfamiliar with this sort of logic (if you're a seasoned programmer, you'll be fine). Basically, if you think of the x axis as column, and the y axis as rows, we're filling the room with floor tiles, starting with the top row - filling in all of the columns of the top row, then moving down to the next row, and so on.
Here's the code:

The create_Tunnel functions
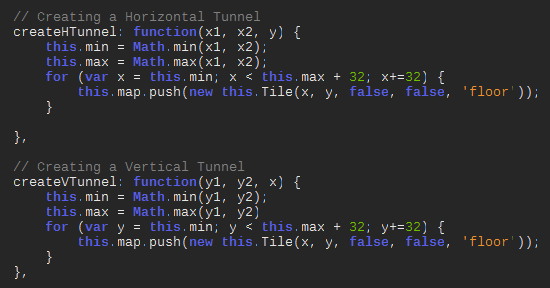
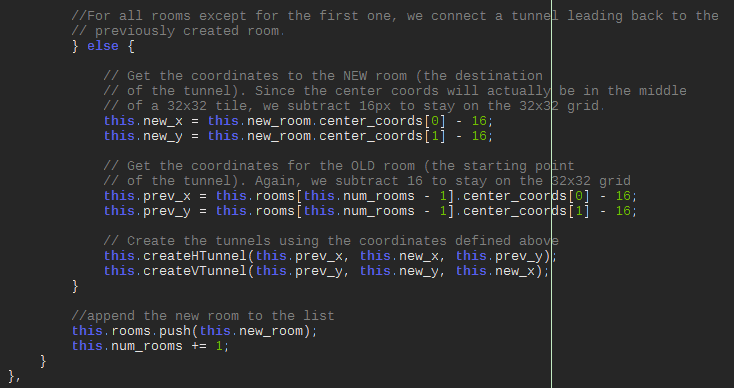
Once we have the rooms created, we can begin creating the tunnels to connect them. The following two functions facilitate creating the tunnels based on the coordinates of the 'new' room, and the 'old' room, so that the tunnels can connect the two.
The logic here is that we create two tunnels. We gather which room is most-left/most-right and which is higher/lower. Then, starting with the most-left and higher one, we create a horizontal tunnel to match the coordinates of the other room, and then a vertical tunnel to do the same. The horizontal and vertical tunnels will intersect, effectively creating a single tunnel.
The makeMap function
Alright, now that we have the tools to create the rooms and tunnels, we can actually get down to the logic of actually mapping them out.
Alright, now that we have the tools to create the rooms and tunnels, we can actually get down to the logic of actually mapping them out.
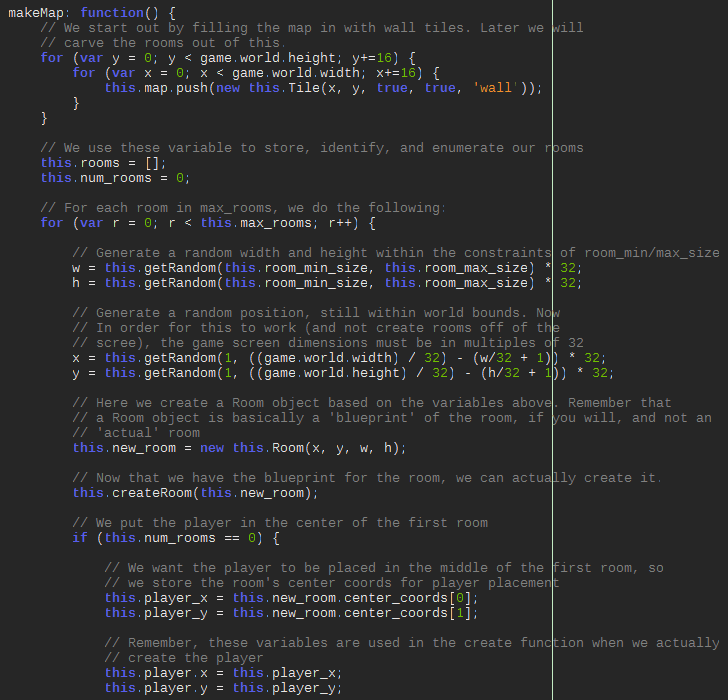
If you're fairly new to programming and you found the makeMap function a little confusing, don't feel bad. I would suggest that you study the function though, until you can see, and explain for yourself, the logic that it performs.
The renderMap function
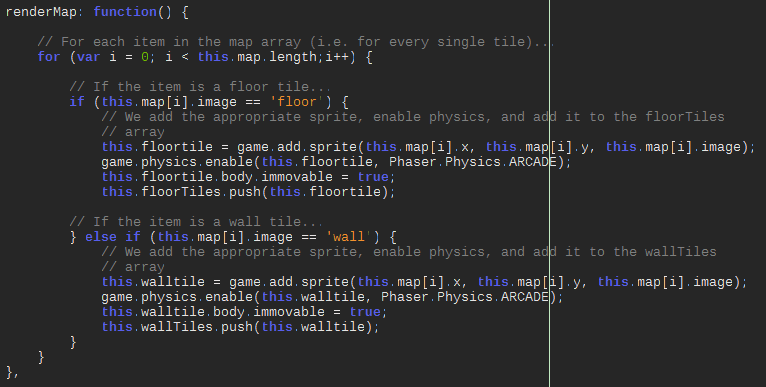
Now, as of yet, we haven't actually put anything on the screen. We've gathered all of the blueprints for the rooms and tunnels, and we know how the map is going to be laid out, but only now, in the renderMap function, do we get to display it to the human player.
Now, as of yet, we haven't actually put anything on the screen. We've gathered all of the blueprints for the rooms and tunnels, and we know how the map is going to be laid out, but only now, in the renderMap function, do we get to display it to the human player.
The update function
Like the 'create' function, the 'update' function is another standard Phaser function.
Now, up to now we haven't talked about the wallTiles and floorTiles arrays. The reason that we have these arrays is so that we can configure physics for these tiles as a group. For instance, we want the player to collide with all wall tiles, but we want him to pass over floor tiles unobstructed.
Here in the update function is where we configure this.

Conclusion
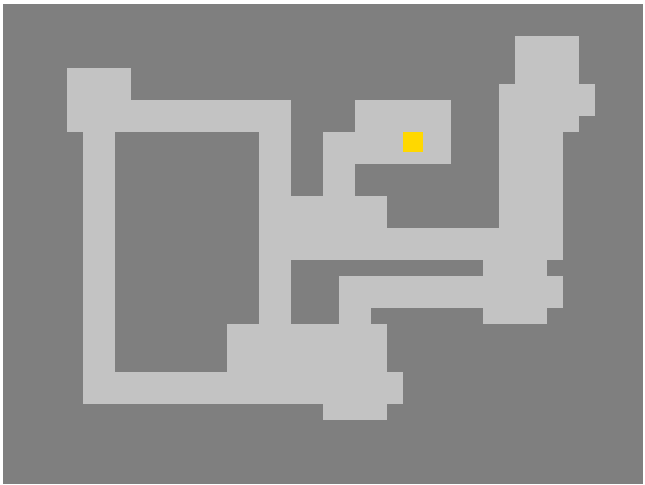
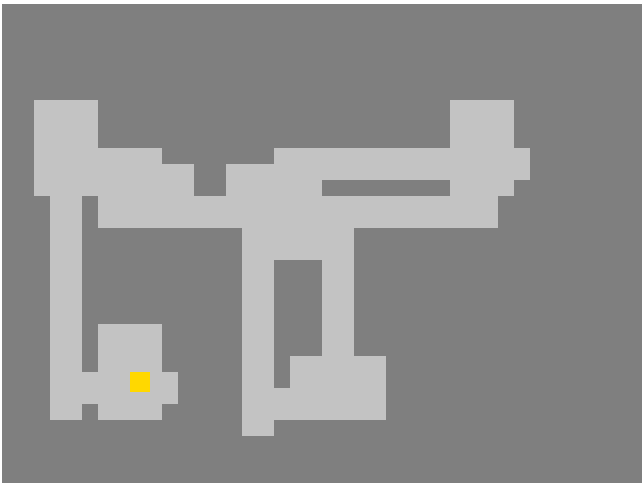
That's all there is to it! Here's a few screen shots of different, completely random renderings (the little yellow guy is the 'player'):
That's all there is to it! Here's a few screen shots of different, completely random renderings (the little yellow guy is the 'player'):
 |  |
Now, this tutorial should definitely be seen as a 'first draft' rather than a finished product. So, if you have any ideas, improvements, etc. please let me know! I'm excited to see how this idea is further developed, and if you actually create a finished game out of it please share - I would love to see it!
If you create a game using this code, you don't have to credit me (if you want to, I'm Chad at [email protected]), but you really ought to give credit to www.roguebasin.com since this is really their code re-purposed.
If you create a game using this code, you don't have to credit me (if you want to, I'm Chad at [email protected]), but you really ought to give credit to www.roguebasin.com since this is really their code re-purposed.
| play.js |
Map.js
Thank you all for the interest and support that you've shown. I really appreciate it.
Now, I've created this new map.js file (you can download below) which is a self-contained Map class that contains everything you need to create a random map.
By default, the map will align to the boundaries of your game (i.e. game.world.width/height). This can be changed, but is outside the scope of this brief tutorial.
LuisQuin did a fantastic job of refactoring my original code. This Map class is actually based on his version, which can be found at https://github.com/plissken2013es/phaserRandomDungeon
1. Link to map.js in your index.html file as so

2. In your play.js file, create a map object (in the 'create' function) based on the Map class

These parameters are here for example. The required parameters are:
Keep in mind that the 'floor' image must be twice the size of the 'wall' image. For example, a good, standard size is 32x32 for the floor and 16x16 for the wall.
3. Configure collision in your play.js file, in the 'update' function
Unfortunately the class doesn't configure collision for you, so you still need to do that manually via the following:
- The image for the floor tiles (ex. 'floor')
- The image for the wall tiles (ex. 'wall')
- Minimum room size (in tiles) (ex. 2)
- Maximum room size (in tiles) (ex. 5)
- Maximum number of rooms possible (ex. 10)
Keep in mind that the 'floor' image must be twice the size of the 'wall' image. For example, a good, standard size is 32x32 for the floor and 16x16 for the wall.
3. Configure collision in your play.js file, in the 'update' function
Unfortunately the class doesn't configure collision for you, so you still need to do that manually via the following:

This last step is actually un-tested. I'll be testing within the next couple days, and if there's any discrepancies, I'll be sure to jump on and correct this.
That's all there is to it! Much easier that creating the map yourself! Here's the map.js for ya:
| map.js |
 RSS Feed

